Staying with the Christmas Theme for another day here. I am LOVING the fact that Metallics are BACK! Yes – they were huge in the ’80’s – which was my era – so I’m especially thrilled to see them everywhere, including Paper Crafting Projects! Metallics really up the beauty of anything. They’re elegant and shimmery and just about irresistible. btw…You still have time for the second half of the 12 Weeks of Christmas! It’s only for my Email Subscribers! Not a Subscriber yet? Sign up HERE.

Today’s card was created for the Add A Little Dazzle Dazzling Diva Challenge using the Inspirational Photo Below. When I’m using an Inspirational Photo, I look at it for a while and then step away and create from memory. This helps me to avoid getting locked into a “literal” interpretation which blocks my mojo. 😉 I took the Gold from the Stockings and the Joy from “Peace, Joy, Love” and created this “Joy Craft Metal Star Holiday Card.”

- Base Card is SU! Very Vanilla Cardstock 5-1/2″ x 8-1/2″, Scored and folded at 4-1/4″.
- Next layer is 4-1/8″ x 5-3/8″ Very Vanilla Cardstock run through the Big Shot in the Beautifully Baroque Embossing Folder.
- A Very Vanilla Satin Ribbon was wrapped around the post card layer and secured behind with Glue Dots.
- A 1/8″ Gold Metallic Ribbon was adhered across the center of the Satin Ribbon and secured behind with Glue Dots. A Metallic Bow was adhered to the card front with Glue Dots.

- The Stars from SU!’s Bright & Beautiful Stamp Set were stamped in Versamark Ink on Very Vanilla Cardstock and embossed using Gold Embossing Powder and a Heat Tool. The Stars were then cut out using Star Framelits. They were adhered to the card front with Stampin’ Dimensionals.
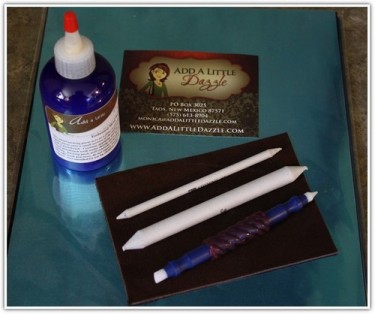
- The word “Joy” from the Wondrous Wreath Framelits was used to cut Golden Glimmer Craft Metal. The word was then embossed using the Beautifully Baroque Embossing Folder and adhered to the card front with Glue Dots.

Challenges:
Dazzling Diva #51 (Inspirational Photo Below)

Virginia’s View Challenge – How to Add a Little Metallic Dazzle


 I love how the leaf turned out with all the shimmer and texture. It’s Vintage and Distressed without being too Grungy.
 This Tag is my Second Attempt at Tim’s November Tag and was created in much the same way as my first version except I intentionally tried to stay brighter with the base tag so the leaf would show through better and reigned my inner grunginess in a bit.

 I applied Glue and Seal (love it!) to the back of the corrugated cut out and layered it over the tag matching up the leaves. I put an acrylic block over it for a couple of minutes to dry. Once it was dry, I trimmed around the edges of the Tag and saved those delicious Distressed pieces for another day! I sponged Black Soot Distress Ink around the edges of the Tag with a Mini Blending Tool.
 I dyed Crinkle Ribbon with Spiced Marmalade, Mustard Seed and Mowed Lawn Distress Stains and pulled it through the hole in the tag. Before I tied it, I slipped an Idea-Ology Pin over it and attached an Idea-ology Token to the pin and then pulled the ends through the loop to tie the ribbon. The bottom of the tag is embellished with a Black and Cream Ribbon from TH Trimmings threaded through an Idea-ology Buckle and secured it with a brad. I added an Arrow from Idea-ology Alpha Parts Framed.