I’m BACK! Wow! That was a loooooong Holiday break and it’s been a little challenging to get my Mojo back this morning! My baby turns 22 this week so I wanted to make her a special shiny Birthday card. She loves Teal so it was the perfect opportunity to break out my new SU! Birthday Bash Designer Series Paper and the matching Bermuda Bay Sequins from the Occasions Catalog – which, btw, goes live tomorrow! Yumm! (I’ll update the links in the am for you.) AND…a new sexy card stock from the Sale-A-Bration Catalog which also begins tomorrow! Big Day!
- Base Card is SU! Whisper White Card Stock cut 4-1/4″ x 11″ and scored and folded at 5-1/2″.
- Next layer is Irresistibly Yours Specialty Designer Series Paper (Sale-A-Bration Catalog – which means it’s FREE). You can see the tone-on-tone shiny little stars in the card stock in this photo. There are several different patterns. LOVE IT!
- A 4″ x 3″ piece of Bermuda Bay Patterned Paper from the Birthday Bash Designer Series Paper Pack is layered onto a 4-1/8″ x 3-1/8″ piece of Bermuda Bay Card Stock. THAT’s why I LOVE coordinating colors!
- A 3-1/4″ x 3-1/4″ piece of Patterned Paper from the Birthday Bash Designer Series Paper Pack is layered onto a 3-3/8″ x 3-3/8″ piece of Champagne Glimmer Paper. The patterned paper has gold foil elements in it!
- The Champagne/Patterned Paper piece is attached to the Bermuda Bay/Patterned Paper piece and then they are adhered to the card front with Stampin’ Dimensionals.

- A piece of Whisper White Seam Binding is wrapped around the front of the post card and secured behind with Glue Dots.
- A strip of Bermuda Bay Sequins is attached to the top of the Seam Binding with Glue Dots and wrapped around the side of the post card and secured with a Glue Dot behind.
- A Triple Bow was tied from Whisper White Seam Binding using the “How To Tie A Double Bow Using Your Fingers Technique” (See a Video HERE). I just looped around another time to create the third bow. This was attached to the seam binding with Glue Dots. The “tails” of the bows were positioned using Glue Dots as well.
- The post card was adhered to the front of the base card using Stampin’ Dimensionals.

- To create the Happy Birthday Greeting, The HB #Happy Birthday Stamp from the Birthday Bash Stamp Set was inked in Bermuda Bay Ink and stamped onto a piece of Whisper White Card Stock and then covered in Clear Embossing Powder and Heat Set.
- It was then cut out using one of the Framelits from the Chalk Talk Framelits Dies.
- To create the borders, a piece of Bermuda Bay Cardstock was cut and then sliced diagonally and reattached behind the greeting to frame it.
- Gold Glimmer Paper was cut using the Chalk Talk Framelit positioned as above and then reassembled behind using adhesive.

- The Birthday Greeting was adhered to the card front and then Gold and Bermuda Bay Sequins were randomly attached using Glue Dots.

-
“Happy” from the Hello You Thinlits Dies was used to cut Champagne Glimmer Paper. (Tip: I put Wax Paper between the die and the Glimmer Paper to help with the release.) It was attached to the inside of the card using Multi-purpose Liquid Glue.

Challenges:
Simon Says Stamp – Monday – “Make New Friends But Keep The Old” (New paper with Old Techniques)
Simon Says Stamp – Wednesday – Anything Goes
Mojo 379
613 Avenue Create – Anything Goes


 I love how the leaf turned out with all the shimmer and texture. It’s Vintage and Distressed without being too Grungy.
 This Tag is my Second Attempt at Tim’s November Tag and was created in much the same way as my first version except I intentionally tried to stay brighter with the base tag so the leaf would show through better and reigned my inner grunginess in a bit.

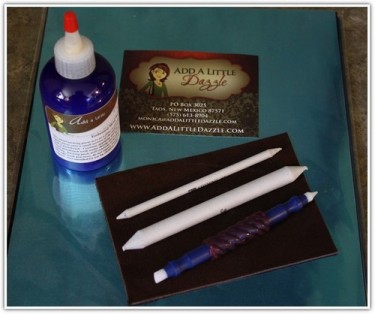
 I applied Glue and Seal (love it!) to the back of the corrugated cut out and layered it over the tag matching up the leaves. I put an acrylic block over it for a couple of minutes to dry. Once it was dry, I trimmed around the edges of the Tag and saved those delicious Distressed pieces for another day! I sponged Black Soot Distress Ink around the edges of the Tag with a Mini Blending Tool.
 I dyed Crinkle Ribbon with Spiced Marmalade, Mustard Seed and Mowed Lawn Distress Stains and pulled it through the hole in the tag. Before I tied it, I slipped an Idea-Ology Pin over it and attached an Idea-ology Token to the pin and then pulled the ends through the loop to tie the ribbon. The bottom of the tag is embellished with a Black and Cream Ribbon from TH Trimmings threaded through an Idea-ology Buckle and secured it with a brad. I added an Arrow from Idea-ology Alpha Parts Framed.