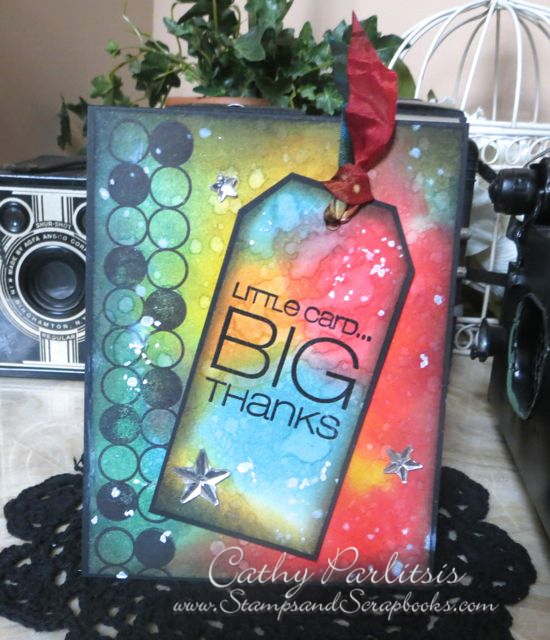
Vintage is my favorite type of Card Making. Rarely can I do simple and Monochromatic. This Patterned Paper really did all the work for me! The delicious ribbon was a fun find from a trip to a far-away Stamp Store – yummmm!

The layers are attached directly to each other with the sentiment circle popped up with Stampin’ Dimensionals.

- The base card is SU! Chocolate Chip Cardstock.
- The layers were created using scraps of the Cartographer’s Collection of Patterned Paper.
- I attached the paper to coordinating card stock and trimmed it so there was a small border.
- The sentiment is from a Wendy Vecchi Stamp Set (Spent the weekend in her classes – OMG!) It was stamped in SU! Chocolate Chip Ink and embossed with Clear Embossing Powder and a Heat Tool.
- The sentiment was cut with a Circle Collection Framelit. The Chocolate Chip circle was cut with a 2 1/2″ Circle Punch and then embossed with the Argyle Embossing Folder in the Big Shot.
- The button has a piece of Crochet Trim tied and attached with a Glue Dot.
- The top layer of the card was attached to the base card with Foam Tape.

Challenges:
Simon Says Stamp – Monday – Anything Goes
Eclectic Paperie – Embossing (Greeting & Background Circle)
Inspiration Emporium – Everything Goes
613 Avenue Create – Anything Goes
Mojo359


 I applied Tissue Tape with Multi-Media Matte.
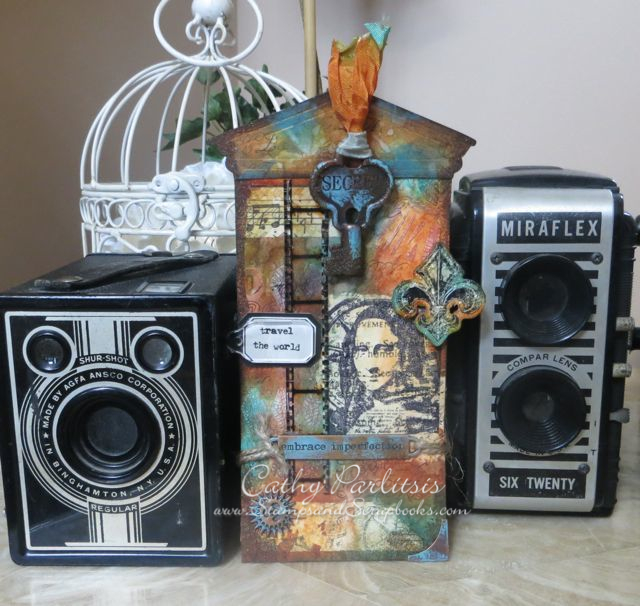
  I stamped Mona Lisa from the TH Mini Classics Stamp Set in Archival Black Ink. Additional stamps were randomly stamped around the Tag.
  I applied Texture Paste through the TH Gothic Stencil and, when that dried, I applied the Texture Paste through the Schoolhouse Stencil to get the numbers across the Tag. (Not shown here.)
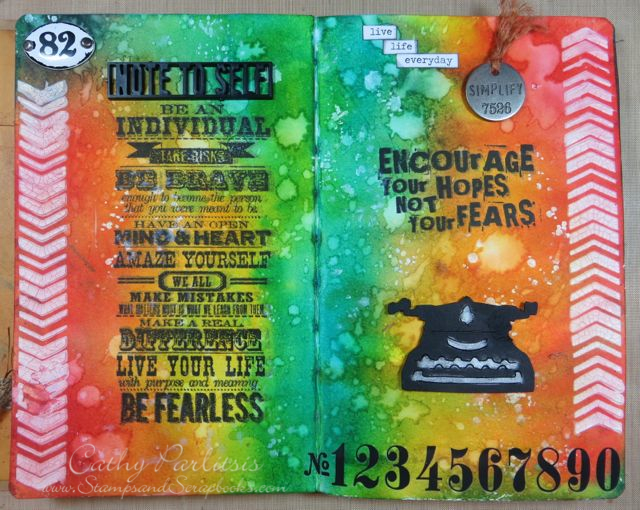
  Distress Stains – Evergreen Bough, Iced Spruce and Rusty Hinge – were applied to the Craft Sheet.
  The Tag was spritzed with Water and swiped through the Inks. Additional Distress Inks were applied to the Tag and then it was spritzed with water to blend the inks.
  The Tag was Heat Set and then Walnut Ink was sponged through the Speckled Stencil.
  Remnant Rubs were attached to a Vial Label. The edges of the Label were Sanded and Inked with Walnut Stain Ink.
  Parts of the Tag were sponged with Distress Embossing Ink and then embossed with Vintage Photo Distress Embossing Powder. A piece of Filmstrip (LOVE it!) was attached to the Tag with the Tiny Attacher. Mini Gears were attached to the bottom of the Tag.
  The Idea-Ology Embellishments were aged using Rusty Hinge and Evergreen Bough Distress Paints.
  Here’s a close up of Mona Lisa, Word Band and Mini Gears.
  The Idea-Ology Key was aged using the Distress Paints and it was also inked in random places with Embossing Ink and then Vintage Photo Distress Embossing Powder was poured on and heated.
  The same Distress Stains were used to dye Crinkle Ribbon for the top of the Tag.
  The Key was attached to the Tag and a Swivel Clasp was attached to the Ribbon.
  The edges of the Tag were Distressed with a Distressing Tool and then inked with Walnut Stain Distress Ink.
  The Idea-Ology Word Band was attached to the Tag with Jute String.
  Before attaching the Ribbon, I backed the Tag with another Tag to give it a little more strength to support the Key.
  Challenges: